Showing posts with label Buenahelena. Show all posts

Monday, October 24, 2011

Make-It Mondays: Wood Block PhotoTransfers


This project is so simple and fun! You can do it on the cheap by knabbing leftover scraps of wood from hardware stores and sneaking in a couple photo copies at the office. They make great small gifts and decorations. I chose images with sayings as well as photographic images. When using text make sure to flip the image before you print it or it will come out backward. Other than that, go wild.


YOU'LL NEED:

Blocks of wood in various sizes, Photo Copies (use copy machine or laser prints), Liquitex Gel Medium, Mod Podge, Large Bristle Brush, Sponge or cloth.

Link
STEPS:

1. Paint a thin layer of gel medium over the surface where you plan to place the photo. Make sure your wood blocks are sanded. No one likes splinters full of glue!


2. Lay the photo copy face down onto the gelled block and smooth it out to remove any air bubble.

3. Let the block(s) dry overnight.

4. Use a damp cloth or sponge to wipe away the paper. The black ink from the photo copy should remain. ( Use the soft side of a sponge. The rougher side will scrape the image away if you're not careful.)

5. Paint a thin layer of Mod Podge over the surface of the transferred image to seal it in.

These make fun paper weights, desk or shelf decorations and gifts. Once the image is sealed, you can finish off the block by painting, staining or varnishing the other sides. If you liked this project you might also be interested in making packing tape stickers. Until next time :)

Monday, September 26, 2011

Make-it Mondays: Pets of Etsy

Finally...one of you has a dog! Thank you Susan, of sculptresslink, for sharing our latest studio creature, Smokey. Susan adopted Smokey from the the Humane Society while she lived in Arizona, procuring her Masters degree in Art Education. She is a worldy assistant who has traveled with her studio boss from Arizona, to Arkansas and now to Rochester, New York. Check her out!

At sixteen, this pooch is still working it, as a model for Susan's creations. In this case, a cupcake barrette.

Sitting expectantly, in the hopes that some polymer clay will drop from Susan's hands and onto the floor. (She thinks it's food.)

Thank the craft lords that the cat spell has been broken! Keep your pets coming, by sending images and a lil' story to buenahelena@hotmail.com.

Monday, September 12, 2011

Make-it Mondays: Pets (or seriously just cats) of Etsy

Hello Team! I'm back again with more feline studio assistants. These two hooligans belong to Carisa of Love and Whiskers (how apt!), along with a slew of other camera shy creatures, including two Shih-tzus, two tortoises and three lizards. Carisa, if you can get the tortoises involved somehow, next time I would love to do an expose called Teenage Mutant Crafting Turtles. Enjoy!


Critiques are best given while sitting on the product.


Pausing to choose the best words of advice...


All Etsy work needs an overnight bodygaurd...even if he sleeps on the job.

Thanks you for sending in your kit-tay shots Carisa. Keep sending me your pets as well team, to buenahelena@hotmail.com. In the coming weeks I will be back with some tutorials so stay tuned! :)

Monday, September 5, 2011

Make-it Mondays: Early Fall's Pets of Etsy

It's getting to be that time of year when you really want a pet to keep you cozy in the studio! I know I didn't mind my cat hanging out on my lap on this chilly rainy day. I think we can pretty much confirm from this (and past) Pets of Etsy posts that we are, for the most part, a bunch of cat ladies ;) This week's creature feature, Caesar, belongs to Marie of Designs by Missrie. He is, according to Marie, " ... a curious young boy and really likes to oversee everything."

"Caesar reigns over the studio :)"

" I think these green beads would go great with those brown beads, Mom."

"All this supervising is hard work!!"

Thanks Marie and Caesar! If you would like your pet featured on the next Pets of Etsy send info and photos to Buenahelena at buenahelena@hotmail.com.

Tuesday, August 23, 2011

Treasury Tuesday: Our Love is On Fire

"Our Love is On Fire"? Our RNEST members are on fire! We were in SO many treasuries this week! And SO many good ones! Once again, I was having a hard time picking the pictured one! My August criteria of featuring color treasuries reigned me in and narrowed it down a little....but not much! I ultimately picked Our Love Is On Fire (featuring Buenahelena's matchstick painting) because the firey color scheme was just so gorgeously vibrant.


There are still a bunch of beautiful treasuries! Be sure to click through the links to see them, and leave a comment telling us your favorite!

Featuring RNEST Members:
Featuring and curated by RNEST Members:
  • MayDay Preview by BeadworkByAmanda, featuring Buenahelena, TurtleFly, InMyHeadStudios, FuzzyBunny, JiBabu, The StitchingStudio, and KiraArts

* If you make or find a treasury that features an RNEST member, or if you are an RNEST Member who makes a treasury, post the link on the wall at RNEST's Facebook Page. Your treasury could be featured on the next Treasury Tuesday!

Saturday, August 20, 2011

Wednesday Wellspring - Buenahelena


Bubbling up from the well this week, is the fun and funky Buenahelena!


Today, one lucky winner will receive
Two "Vintage Fun" Button Magnets. Each one is made with collage cut outs from vintage, 1960's McCalls Magazines. They have strong magnets on the back. This artist keeps her shop eco-friendly with a wide variety of recycled and re-purposed items. Take a look around and get inspired! You may just find a creative new use of one of your own vintage treasures!


And now for the rules (This giveaway is open to the US residents only.):

MANDATORY ENTRY #1: Go to Buenahelena, heart the shop, and then leave a comment here telling me your favorite item.

MANDATORY ENTRY #2: Become a follower of this blog and leave a comment letting me know- or if you are already, leave a comment saying you're a loyal follower.

BONUS ENTRIES (leave a separate comment for each):


1. "Like"
RNEST on Facebook.
2. "Like" Buenahelena on Facebook

3. Follow
Buenahelena's artistic blog
4. Tweet and blog about this giveaway and leave a coment here with the link.
5. Write a comment here saying what the people in the pictures might be thinking!

The winner will be chosen using the random number generator on Tuesday, August 30th and will be announced in the next Wednesday Wellspring.


Monday, August 15, 2011

Make-It Mondays: Still More Pets of Etsy

Having done this Pet series several times now, I don't think anyone on our team is petless. It's a fact: we need fuzzy creatures in order to make it as crafters and artisans. This week's pets belong to Kira of KiraArts. Enjoy!

Kira: "I have two pets, Luna my dog (a dachshund/miniature pinscher mix) and Terra my cat (the offspring of a friend's barn cat)."

Luna and Terra taking their afternoon nap in Kira's craft room.


Terra "helping" with some yarn when she was a kitten.


Terra is in the craft room a lot. Maybe it's because she was in there a lot when she was a kitten. She is often curious as to what Kira's doing and decides to hop up on her desk to investigate.


Luna is often just content to lay down near her.


"What is this thing, Mom?"


"Mommy, can you stop sewing and please let me outside?"

If you would like your cat to become an instant RNEST celebrity, contact Buenahelena (buenahelena@hotmail.com) with pictures and fun tails (pun intended).

Monday, August 8, 2011

Make-It Mondays: More Pets of Etsy

Many of our Etsy team members have a special creature helping them out in the studio. We simply can't make it without them (or at least that's what they want us to believe!) This week Heather Vitticore's feline assistant, Kidden, is helping her make items you'll find in her two shops: Merv and Dolores and Heather Vitticore.


Don't worry. Heather says the iron isn't on. You don't need one when there's a warm body around anyways right? If you would like to have your pet featured in the next Pets of Etsy, contact : buenahelena@hotmail.com

Monday, August 1, 2011

Make-it Mondays: DIY Packing Tape Stickers

I love experimenting with materials and finding solutions for items I've collected at flea markets and thrift shops. I had a bunch of images cut out from vintage magazines and being an Etsy seller I had quite a bit of clear packing tape for mailing orders. With these two materials, I experimented with making some unique DIY stickers. They are easy to make and add a layer of richness that you can't get by cutting and pasting the magazine paper alone.


You'll need:
Clear Packing Tape
Clippings from retro magazines (small enough to fit within the tape!)
Scissors
Bone folder
Sponge (with soft & scrubby sides)
Water


Step 1: Cut off a piece of tape and lay your image face down to the sticky side of the tape.


Step 2: Use a bone folder or other hard, smooth object to press the image onto the tape.


Step 3: Wet your sponge and dab it over the pack of the magazine paper until it is saturated.

Step 4: Use the scrubby side of the sponge to take off the extra layers of paper.


Step 5: Let the piece of tape dry. It will regain its stickiness.


Step 6: Cut out your sticker from the excess tape and stick it somewhere!


Now you've got a great one of a kind sticker. Want a whole bunch? You can scan your retro images and print multiples on a laser printer. Inkjet will not work. I have only used magazines from the 60's and 70's. It would be worth the experiment to see if newer ink and printing processes from current magazines work as well.

Monday, July 25, 2011

Make-it Mondays: DIY Button Stamp

Recently our teammate, Kira of KiraArts, shared a button stamp project on her blog, made from an empty thread spool and craft foam. Now she is ready to share how she made these DIY stamps in 10 easy steps. Check these out!


Materials:
  • Empty plastic spools (you could also use old prescription bottles)
  • Craft foam (the kind you find in the kids' craft section)
Tools:
  • Hot glue gun
  • Scissors
  • Hole punch
  • Marker, pen, or pencil
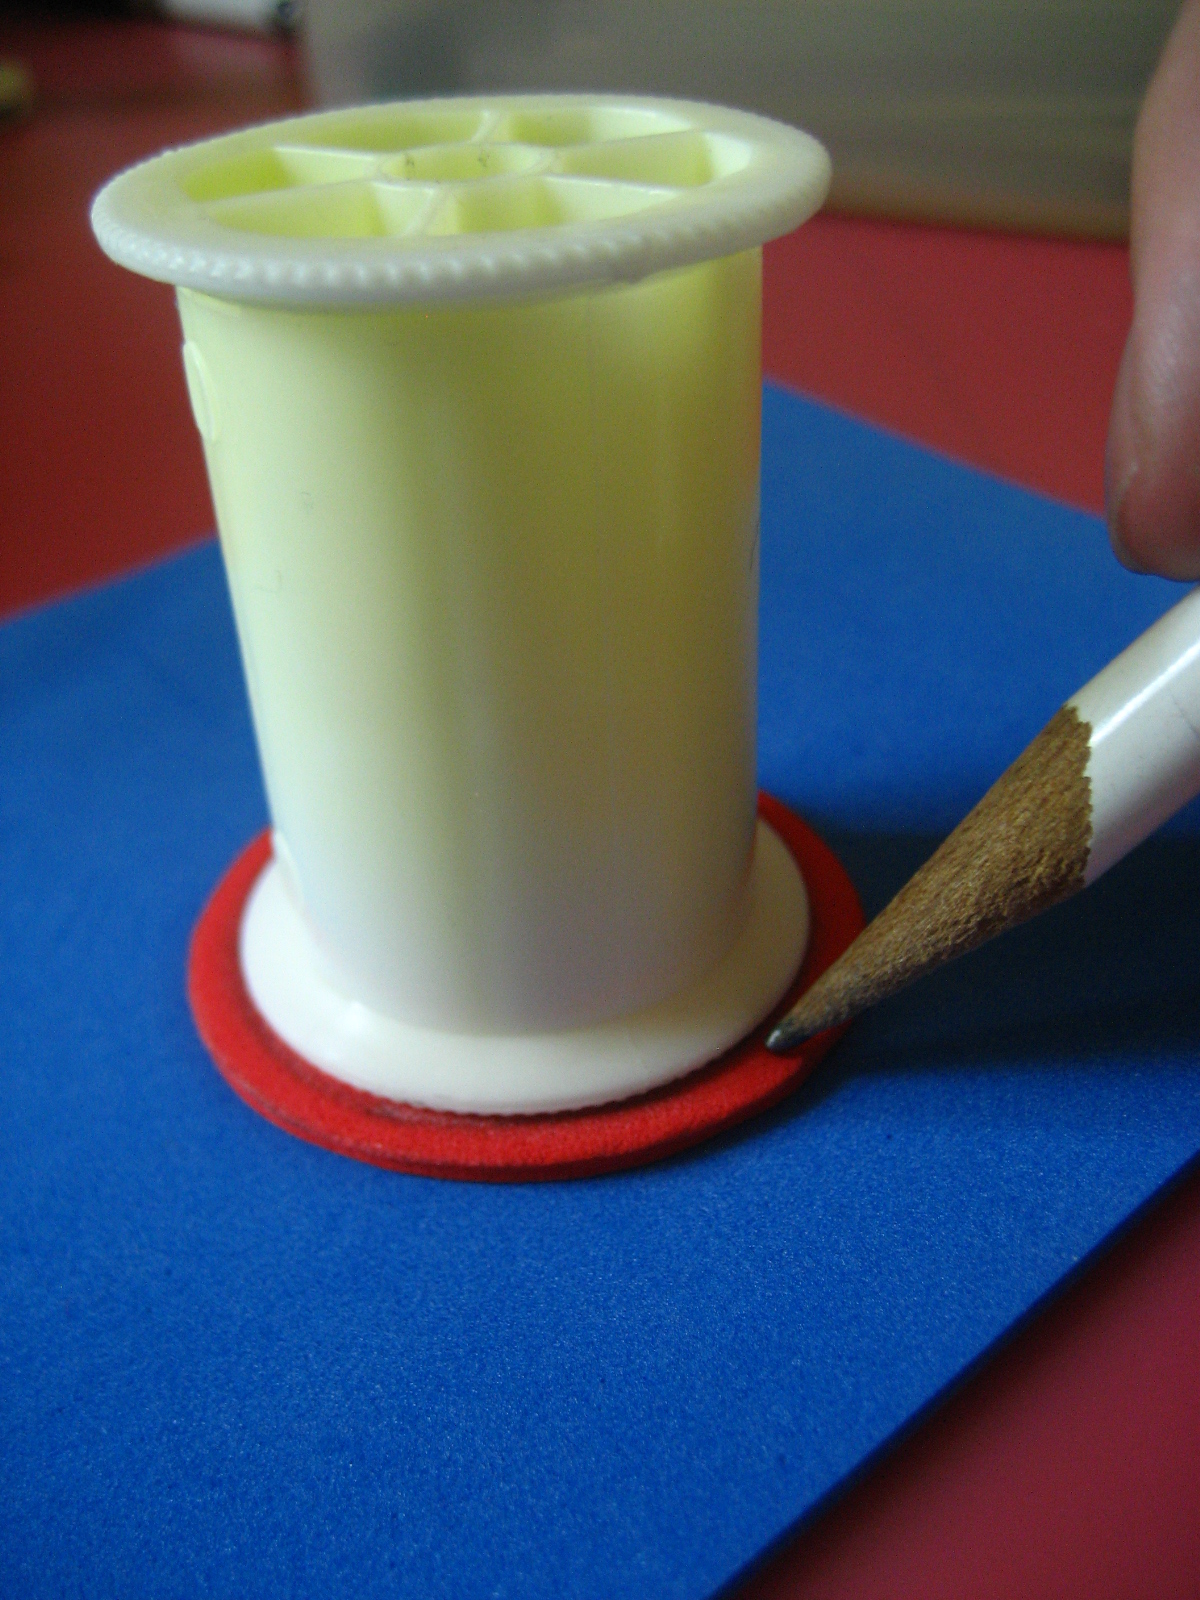
Step 1: Use the spool you want to use for your stamp to trace 4 circles onto the craft foam (I did 2 circles on blue and 2 circles on red.)

Step 2: Cut the circles out.

Step 3: Take one circle and punch 4 holes in it to look like button holes (or you can do 2 holes if you'd like).


Step 4: Use the hot glue to attach one of the blank circles to the top of the spool. (You could also use chipboard if you'd like. It might even work better. The first circle is just a base to glue the other part to.)

Step 5: Glue on the "button" foam circle.


And there's the first stamp!

Step 6: Take the second red circle and use a smaller spool to trace a circle.

Step 7: Cut the circle out so you have a hole in the middle. The circle should now look like an "O".

Step 8:Glue the blue foam circle onto the other side of the spool, then glue the "O" on top of it.

Step 9: Remember when you used the hole punch earlier? Salvage those little foam dots from your hole punch. These will be the "button holes" for this side of the stamp.

Step 10: Carefully glue the dots in the middle of the "O" to look like button holes. And now the second side is done!

One stamp...two designs!

Note: Be sure to clean your stamp off after using it!...especially if you plan on using the other side right away. Failure to do so will result in inked-up hands! I usually use cheap baby wipes from the dollar store.

I did a smaller one with a two-hole button design.

Happy Stamping! :) For more great stamp designs, check our other teammate's, John of Jackbear Stamps, Etsy shop.