Showing posts with label tutorial. Show all posts

Monday, August 26, 2013

Make-It Monday: Make Your Own Tent Weights

When you do craft shows a lot, you experience shows in all sorts of weather.  Everyone thinks about having a good tent to keep you (and your art!) shaded in the sun and dry in the rain...but we can easily forget about wind!  And high winds can easily turn your tent into a giant kite if you don't have it properly weighed down!
So this week's Make-It Monday project  will be teaching you how to make your own tent weights... courtesy of Francesca DeCaire Glass Artist!  

"Last year, Jason and I made some weights for my EZ-UP tent. I’m not sure this is the way I would go about it today, but it works out alright and they are certainly heavy enough. We used a tutorial that I found as a guide. My weights are slightly different and a few pounds heavier, approximately 40 pounds each. Materials totaled much higher than anticipated, roughly $140.
With these weights my tent has been through gusts of wind up to 40 mph without taking flight. I have seen other tents go down that were not secured with enough weight, including one that destroyed my own tent.
Here is an example of really bad weights from a show I just did this week! Boy was I glad that wind didn’t come with the rain storm we had.
Weights or wind chimes? These would knock me straight in the head in high winds.
Here is how we made my weights.
Materials:
  • One 10′ 4″ diameter PVC pipe, cut into four 2 1/2′ sections
  • Eight 4″ diameter PVC end caps
  • Four 12″ x 1/2″ eye bolts
  • Sixteen 1/2″ hex nuts
  • Eight 5/8″ washers
  • PVC primer and glue
  • 2 bags of 80lb Quickrete mix
  • Water
  • Wheelbarrow or tray for mixing cement
  • Shovel and scoop for mixing and pouring cement

making weights for tent - 02
Make sure that the ends of the PVC pipe are clean. You can remove burs with sandpaper.
making weights for tent - 05
Prime the insides of 4 caps and the outside of one end of each pipe.
making weights for tent - 06
After the primer sets apply the glue.
making weights for tent - 07
Firmly attach the cap and pipe.
making weights for tent - 09
With the remaining 4 caps drill holes for the eye hooks.
making weights for tent - 11
Prime the drilled caps. Insert eye hook bolts. Thread on nuts and washers.
making weights for tent - 12
Prepare your cement mix. Follow the manufacturer’s directions.
making weights for tent - 17
Fill the pipes with concrete, we used a plastic cup. Bounce pipes many times to remove air pockets. Prime and glue top of pipes and inside of drilled caps. Attache when ready. Bounce again to remove air pockets around eye hooks.
making weights for tent - 18
Allow the weights to cure standing vertical.

Monday, August 19, 2013

Make-It Monday: Spiral Tie-Dye

This week's Make-It Monday project is a summery tie-dye tutorial from RNEST member Betsy of Sunshine On Water. (originally posted on her blog).

"A few weeks ago, my kids and I were in a tie-dye phase. They wanted to tie-dye and it was a fun summer project! Me being artistic, I went online and watched an hour long video on how to tie-dye shirts… it was a great video, very helpful but really long!  There were a few key things and I’ll share them with you here.  I dyed a handful of shirts, some for my kids, some for gifts and some to sell at local shows.   I have a few listed on my etsy shop,www.etsy.com/shop/SunshineOnWater, check them out!  I only use 100% cotton shirts that are prewashed!
P1390077
Hand-dyed shirts
by Betsy Murray
First thing, buy a white shirt that you like the look & feel of… there’s no sense going through the work if you don’t like the style or fit of the shirt!  I suggest something that is 100% cotton since the dye will not adhere well if there are other fibers in the material (such as rayon, etc.).   Set all your supplies out on an easily washable table (we used our plastic picnic table).  You need: a spray water bottle full of warm water, newspaper, plastic gloves, rubber bands and of course your dye.  I recommend a good quality dye, it will retain the color better and you have more color options with a dye such as Dylon.
P1380322
Supplies
  • Put the plastic gloves on and mix your dye with warm water in a plastic bottle provided with the dye or in the aisle you purchased your dye from.  Read the dye instructions for the dye to water ratio!
  • Spray your white shirt with warm water from your water bottle.  Be sure all of the shirt is covered with a mist of water.
P1380352
Spray with water

  • Next, using a dowel, place the it down on one spot of the shirt and twist tightly(this will form your spiral so pick a location you want the spiral to be at now!)
P1380329
This is a child’s shirt. Twist to form the spiral.
P1380343
Twist tightly

  • Now that your shirt is twisted, it should look like the photo below… Remove the dowel carefully (HOLD onto the shirt so it doesn’t come undone)!!  Then place rubber bands around the side of the shirt and across the top.  It will look like you’re making a pie with slices.  Each slice will form a spiral.
P1380327
Twisted, now add the rubber bands.

  • Then squirt the dye color of your choice on a “piece of the pie” so as to stay inside each piece of pie.  Use the rubber bands as your guide.  You can do the same color on 2 pieces of pie next to each other if you want a bigger spiral. Or you can do only one color in each piece of pie.  If you have 3 colors of dye, you can use all 3 as we did on the shirt below.
P1380351
Three colors of dye were used on this shirt
P1380335
This one has 2 colors of dye on it.

  • Keep your shirts wrapped in the rubber bands and place in a plastic bag for about 4-8 hours.
  • Finally, remove the rubber bands in the sink, unwrap the shirt carefully (so the dye doesn’t drip on the floor), rinse in cold water and wring out.  Then put it in the washing machine and wash in cold water.  Be sure you DO not wash your dyed shirts with other clothes!!!  Then dry in the dryer.  Voila…. now you have a beautiful shirt!
P1390367
Beautiful 2 spiral kids shirt!

There was one secret trick to tie-dying that I left out of this blog, I wonder if anyone knows what it is??  To find out take a look at my etsy profile,www.etsy.com/people/BetsyOnClover!
Have fun making your own tie-dye shirt!
Betsy~ Sunshine On Water"


Monday, July 25, 2011

Make-it Mondays: DIY Button Stamp

Recently our teammate, Kira of KiraArts, shared a button stamp project on her blog, made from an empty thread spool and craft foam. Now she is ready to share how she made these DIY stamps in 10 easy steps. Check these out!


Materials:
  • Empty plastic spools (you could also use old prescription bottles)
  • Craft foam (the kind you find in the kids' craft section)
Tools:
  • Hot glue gun
  • Scissors
  • Hole punch
  • Marker, pen, or pencil
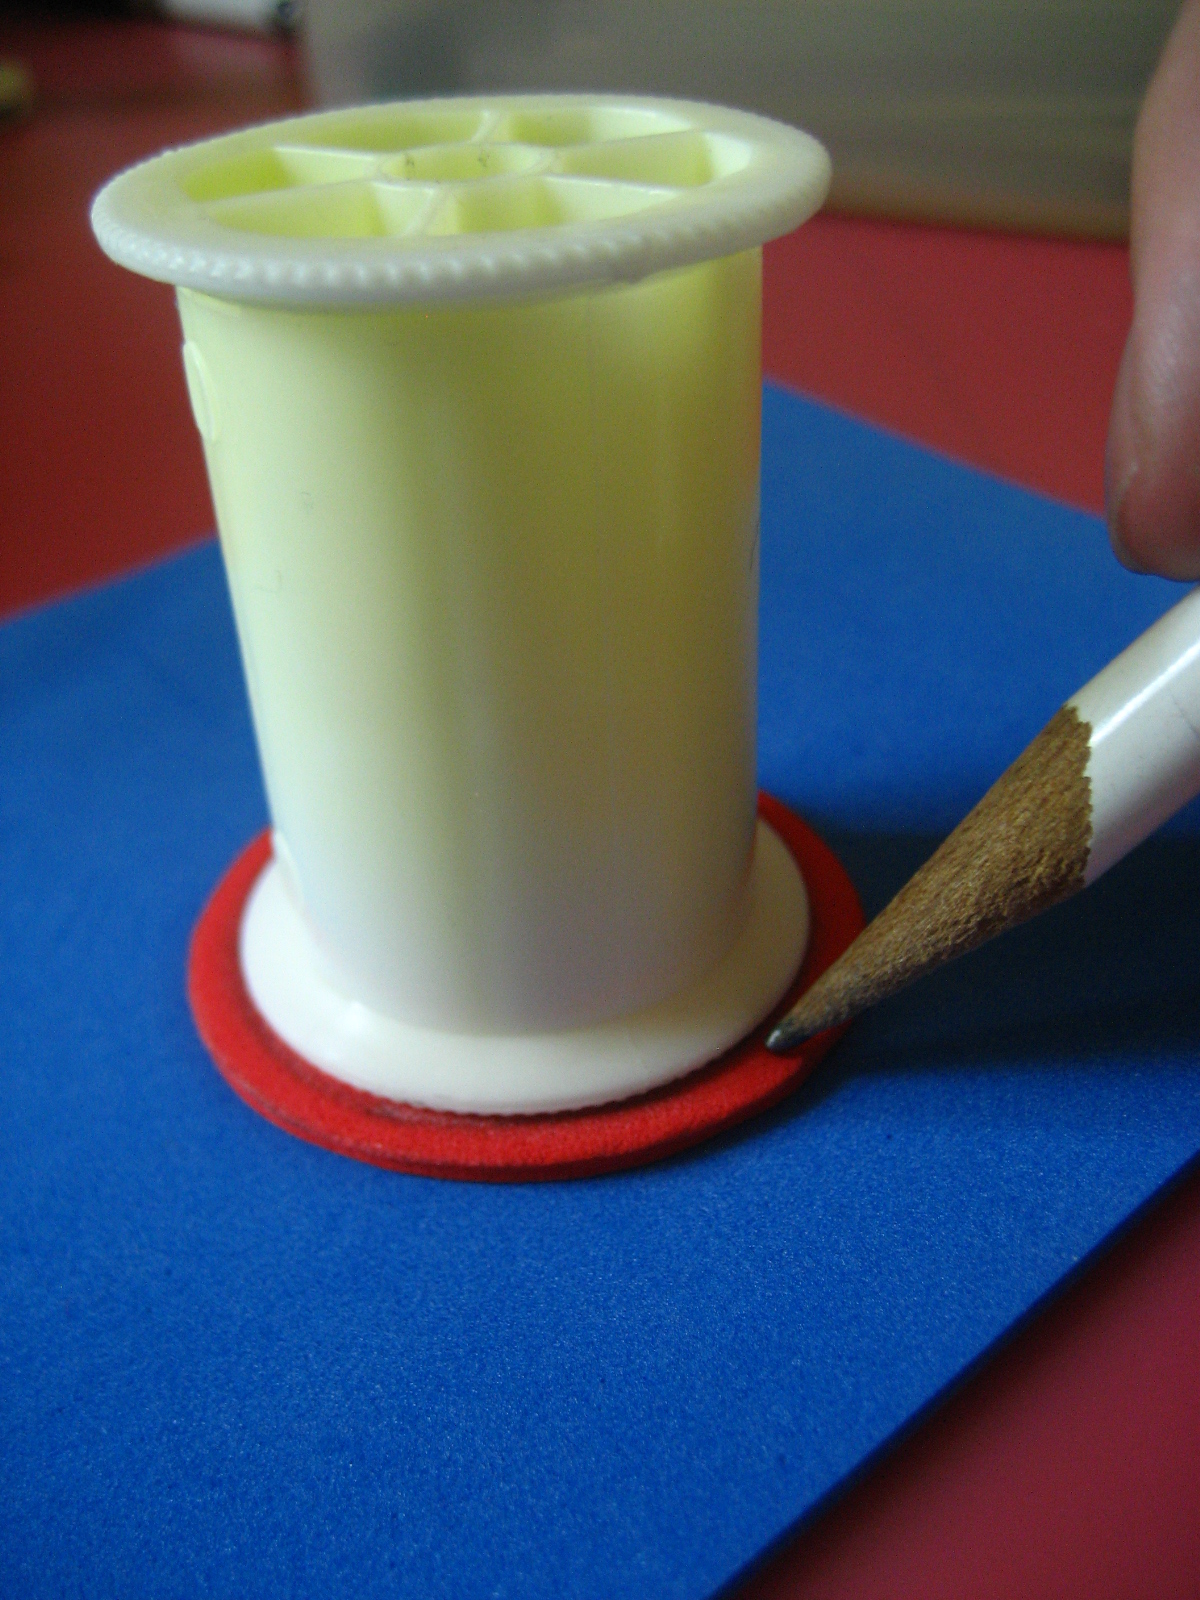
Step 1: Use the spool you want to use for your stamp to trace 4 circles onto the craft foam (I did 2 circles on blue and 2 circles on red.)

Step 2: Cut the circles out.

Step 3: Take one circle and punch 4 holes in it to look like button holes (or you can do 2 holes if you'd like).


Step 4: Use the hot glue to attach one of the blank circles to the top of the spool. (You could also use chipboard if you'd like. It might even work better. The first circle is just a base to glue the other part to.)

Step 5: Glue on the "button" foam circle.


And there's the first stamp!

Step 6: Take the second red circle and use a smaller spool to trace a circle.

Step 7: Cut the circle out so you have a hole in the middle. The circle should now look like an "O".

Step 8:Glue the blue foam circle onto the other side of the spool, then glue the "O" on top of it.

Step 9: Remember when you used the hole punch earlier? Salvage those little foam dots from your hole punch. These will be the "button holes" for this side of the stamp.

Step 10: Carefully glue the dots in the middle of the "O" to look like button holes. And now the second side is done!

One stamp...two designs!

Note: Be sure to clean your stamp off after using it!...especially if you plan on using the other side right away. Failure to do so will result in inked-up hands! I usually use cheap baby wipes from the dollar store.

I did a smaller one with a two-hole button design.

Happy Stamping! :) For more great stamp designs, check our other teammate's, John of Jackbear Stamps, Etsy shop.


Monday, July 18, 2011

Make-it Mondays: Ink Blot T-Shirts

Every summer I counsel at a Senior High camp on Lake Erie. This year for crafts I wanted to take a new spin on the tried and true tie-dye craft project. I found a really cool tutorial on Instructables, based on Rorschach ink blot tests. These are super easy and give you pretty stunning results.

You will need:
  • A pre washed cotton t-shirt
  • Fabric paint (I used speedball silkscreen ink, found at most craft stores)
  • Craft/Popsicle Sticks
  • A large piece of cardboard
  • Flat thumbtacks
  • Ruler (preferably a yard or longer)
  • X-acto or utility knife
  • Iron

Step 1: Score a line down the middle of the back of your cardboard, using a ruler and x-acto knife. Don't go all the way through. Just enough so the cardboard can fold in half.


Step 2: Push the cardboard inside the shirt. Center it by lining up the crease in the card board with the care tag. Smooth the shirt out against the board, but be careful not to stretch it. Place 8 tacks to secure the top and bottom of the crease as well is the sides of the shirt.


Step 3: Add random paint splatters on one side. I used three colors, you can use as many or as few as you like. I also like to drizzle the paint on with small craft sticks. Be careful not to go too thin (design won't transfer) or too thick (design will crack).


Step 4: Fold the cardboard from the blank side of the shirt over your wet paint design.


Step 5: Open it up and you have a great ink blot design! Remove cardboard and tacks. Heat set with an iron, following the settings suggested for the particular fabric paint you are using.


Here is an example of one I made for myself. Enjoy as others interpret the psychological implicatons of your t-shirt design :)

Monday, May 30, 2011

Make-it Mondays:Post-It Notebooks

This week's tutorial comes from Kira Sinclair of KiraArts....well actually from her mom ;) These would make great gifts and perk up boring desk at work too. Enjoy!!!

From Kira:
At my request, my mom wrote the original blog tutorial for these cute little Post-It Notebooks that she makes. I've done a bit of editing, elaborating, and reformatting... but all the craft work shown in this post is all her! (I should get her to do a tutorial for one of her coffee cup cards/books).


Step 1:
First cut your base card stock 7 1/8 inches by 3 1/4 inches. (I used black...since a friend, who was destashing her scrapbooking supplies, gave me a lot of this thick, sturdy, black cardstock.) Crease at 3 1/2 and 3 6/8. (See picture above.)


Step 2:

Create Flowers or circles from punches or what ever design you want. You can even use rubber stamps, markers, geometric shapes, whatever you want! (This is the fun and creative part!)


Step 3:


Glue a 3 by 3 piece of paper on top of the black cardstock (I used lime green), then glue on your embellishment (I used green & yellow paper flowers).


Step 4 (Optional):


If you want your inside cover to be a pretty pattern or a different color from the base cardstock, you can glue some patterned/colored paper on the inside of the cardstock cover.


Step 5:


Finally, glue the spine of the 3 inch Post-It Note pad into the area where you creased for the folds. (OR, alternatively, you could glue the pad to the bottom of the inside of the booklet, but I recommend gluing the spine.)


And there you have it! A cute little Post-It Notebook to pretty up your regular old boring Post-Its! You can make lots of them with different designs. You can even personalize them. It's a quick and easy project and can be a great little handmade gift!


*A special thanks to my mom for humoring me and writing the original tutorial on her blog (even though she is insecure about her blogging capabilities!), and for providing most of the photos!*